Can-Am X3 Subwoofer Box Guide: Fitment, Waterproofing & Amp Cooling Solutions
When you’re tearing across open dunes or picking your way through muddy trails, the right soundtrack can make the adventure unforgettable. For Can-Am X3 owners, that often means upgrading to a Can-Am X3 subwoofer box for deep, powerful bass that cuts through engine noise and wind.
However, adding a subwoofer to your X3 isn’t as simple as bolting it in place. The process comes with unique challenges that require careful planning. You’ll need to consider X3 sub box under-seat fitment, which varies between 2-seat and 4-seat models, making measurements and clearance checks essential.
Then there’s the matter of protection. Riding in wet or muddy conditions increases the risk of water intrusion, so proper sealing and X3 subwoofer water protection become crucial for longevity and performance. Finally, hot summer rides can push your amplifier to the limit, making amp placement and cooling strategies essential to prevent thermal shutdowns.
This guide covers it all, fitment, waterproofing, amp cooling, and expert tips, so you can enjoy thundering bass without compromising reliability on any terrain.
Understanding Can-Am X3 Subwoofer Box Options
Before you break out the tools, it’s worth understanding why not all Can-Am X3 subwoofer box options are created equal. Factory audio leaves a lot to be desired, especially for riders who crave deep, clean bass at higher volumes.
Factory Audio System Limitations
The stock system’s low-powered speakers and limited bass response often get drowned out by engine noise, wind, and terrain. Even with premium factory upgrades, bass output typically falls short.
Benefits of Adding a Subwoofer to Your X3
- Fills in the low-end frequencies for a richer sound
- Handles power more efficiently, reducing distortion
- Enhances music clarity at any speed
- Complements other Can-Am X3 audio upgrade components for a balanced system
X3 Sub Box Fitment: 2-Seat vs 4-Seat Models
Getting the X3 sub box under-seat fitment right is one of the most important steps in ensuring your subwoofer delivers great performance and lasts for years. The available space and layout differ between models, so planning ahead is key.
Under-Seat Space Differences Between Models
In the Can-Am X3 2-seat vs 4-seat subwoofer discussion, space is your first consideration.
- 2-Seat Models: These typically offer a bit more under-seat room, which is great for larger subwoofer enclosures. However, wiring access can be tighter, requiring more precise routing to avoid pinching cables.
- 4-Seat Models: The rear seats often limit sub box height, affecting X3 subwoofer box dimensions and making low-profile enclosures a necessity.
Heater and Seat Base Interference Issues
If your X3 has a factory heater, expect X3 sub box heater interference. Heater ducts and mounting hardware can block prime under-seat real estate. Additionally, Can-Am X3 seat base clearance can be minimal, making careful measurements essential before purchasing or building a box.
Measuring for Proper Subwoofer Clearance
- Remove the seat to check for obstructions
- Measure length, width, and height while leaving space for ventilation
- Compare to X3 subwoofer enclosure design specs to ensure a flush, functional fit
Solving Water Ingress in Under-Seat Subwoofer Enclosures
Trail riding means exposure to water, mud, and dust, none of which your sub likes.
Common Water Entry Points in X3 Sub Boxes
- Gaps between the enclosure and the seat base
- Wire pass-through holes without grommets
- Poorly sealed seams in Can-Am X3 waterproof sub box builds
Effective Sealing Techniques That Preserve Sound Quality
- Marine-grade silicone at all joints
- Rubber gaskets for speaker mounts
- Weatherproof pass-through grommets for the X3 subwoofer wiring harness
Drainage Solutions for Wet Riding Conditions
Even with the X3 subwoofer's water protection, some moisture can sneak in. Small drainage holes at the enclosure’s lowest point let water escape without killing bass performance. Pair this with a hydrophobic speaker grill for maximum protection.
Amplifier Placement and Cooling Solutions
Your subwoofer’s performance depends heavily on how and where the amp is mounted.
Optimal Amp Mounting Locations in the X3
When considering Can-Am X3 amp placement cooling, the goal is to avoid crammed, poorly ventilated spots. The most popular Can-Am X3 amplifier mounting areas include:
- Behind the dash (easy wiring but limited airflow)
- Under the passenger seat (good access, but potential for heat buildup)
- On the rear firewall (solid airflow if shielded from mud and water)
Preventing Thermal Shutdown in Summer Heat
The X3 subwoofer thermal shutdown happens when the amps overheat in high temperatures. Heat sinks, thermal fans, and avoiding direct sun exposure can save the ride.
Ventilation and Heat Dissipation Strategies
- Use amp racks that allow airflow on all sides
- Consider X3 amp overheating prevention fans in sealed areas
- Keep wiring neat to reduce heat pockets
Best Can-Am X3 Subwoofer Box Products and Brands
Choosing the right Can-Am X3 subwoofer box comes down to balancing fitment, durability, and sound quality. With so many options available, knowing the top performers can save you both time and frustration.
Top-Rated Under-Seat Subwoofer Options
- Ssv Works Under-Seat Enclosures – Popular for their dependable X3 sub box under-seat fitment and excellent weather resistance, these enclosures are built to handle off-road conditions without sacrificing sound.
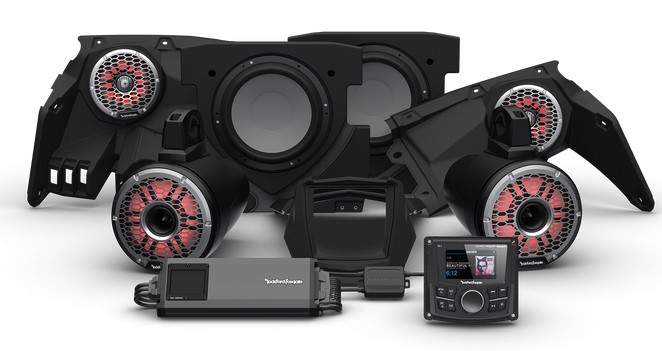
- Rockford Fosgate Solutions – Known for delivering high-power handling in designs with compact X3 subwoofer box dimensions, making them a great choice for riders with limited space.
- Custom Marine-Grade Builds – Built to order, these are perfect for riders who want unique setups and maximum durability in harsh environments.
Custom vs Pre-Made Enclosure Comparison
- Custom Builds: Ideal for riders needing specialized X3 sub box custom fabrication to fit around heaters, accessories, or unusual layouts. They provide a perfect fit and personalized sound but require precise measurements and longer lead times.
- Pre-Made Units: Designed for faster installation with predictable fitment. They often feature factory-matched aesthetics, making them a solid choice for riders who want a hassle-free upgrade.
Professional Installation Tips for X3 Sub Systems
Installing a subwoofer in your Can-Am X3 isn’t just about dropping it in and cranking the volume. A professional approach ensures reliable performance, safety, and sound quality that holds up in any riding condition.
Wiring and Power Requirements
A well-thought-out X3 subwoofer installation guide should start with proper wiring planning. Select a power wire gauge that can handle your amplifier’s draw without overheating. Make sure the fuse is placed close to the battery for maximum protection, and confirm that your battery capacity is sufficient to handle the added load. Using the correct X3 subwoofer wiring harness is critical, it not only streamlines the installation but also ensures secure, reliable connections that stand up to vibrations and off-road abuse.
Integration with Factory Audio Systems
Adding a subwoofer without proper signal integration can lead to distortion, imbalance, or even damage to your components. For a seamless Can-Am X3 audio system upgrade, use an OEM-compatible DSP (digital signal processor) or a quality line-output converter. These devices allow the subwoofer to blend smoothly with your factory speakers, giving you deep bass without overpowering the rest of the system. Taking the time to integrate correctly results in a balanced, crystal-clear sound experience every time you ride.
Maintenance and Troubleshooting X3 Audio Upgrades
Even the best audio upgrades need a little attention to keep them performing at their peak. Regular checks and quick fixes can save you from unexpected silence or distorted sound out on the trail.
Seasonal Maintenance for Wet/Muddy Conditions
Keeping your X3 audio system in top shape requires regular upkeep, especially if you ride in wet or muddy terrain. After every muddy run, take the time to inspect your Can-Am X3 waterproof sub box seals for signs of wear or damage. Even small gaps can let in water that harms your sub’s performance.
Next, check your amplifier’s cooling fans for mud or debris buildup, blocked fans can affect the Can-Am X3 amp placement cooling and lead to overheating issues. Finally, protect all electrical connections by applying dielectric grease. This prevents corrosion from moisture, ensuring consistent power delivery and long-term reliability.
Common Problems and Quick Fixes
- No Sound: Start by checking the amplifier fuse and inspecting the wiring harness for loose or damaged connections.
- Distorted Bass: A common culprit is air leakage. Examine your Can-Am X3 sub enclosure sealing to make sure it’s airtight.
- Amp Overheating: If your amp shuts down mid-ride, revisit your X3 amp overheating prevention strategies. Consider relocating the amplifier to a cooler spot or adding ventilation to improve heat dissipation.
Final Thoughts
Upgrading to a Can-Am X3 subwoofer box can transform your rides from background noise to full-throttle concert experiences. By understanding X3 sub box under-seat fitment, accounting for Can-Am X3 2-seat vs 4-seat subwoofer differences, mastering X3 subwoofer water protection, and optimizing Can-Am X3 amp placement cooling, you can avoid the headaches of X3 subwoofer thermal shutdown and long-term performance issues.
If you want a pro installation that nails every detail, from X3 subwoofer installation guide precision to Can-Am X3 sub enclosure sealing, contact us and let’s get your sound system trail-ready.
-
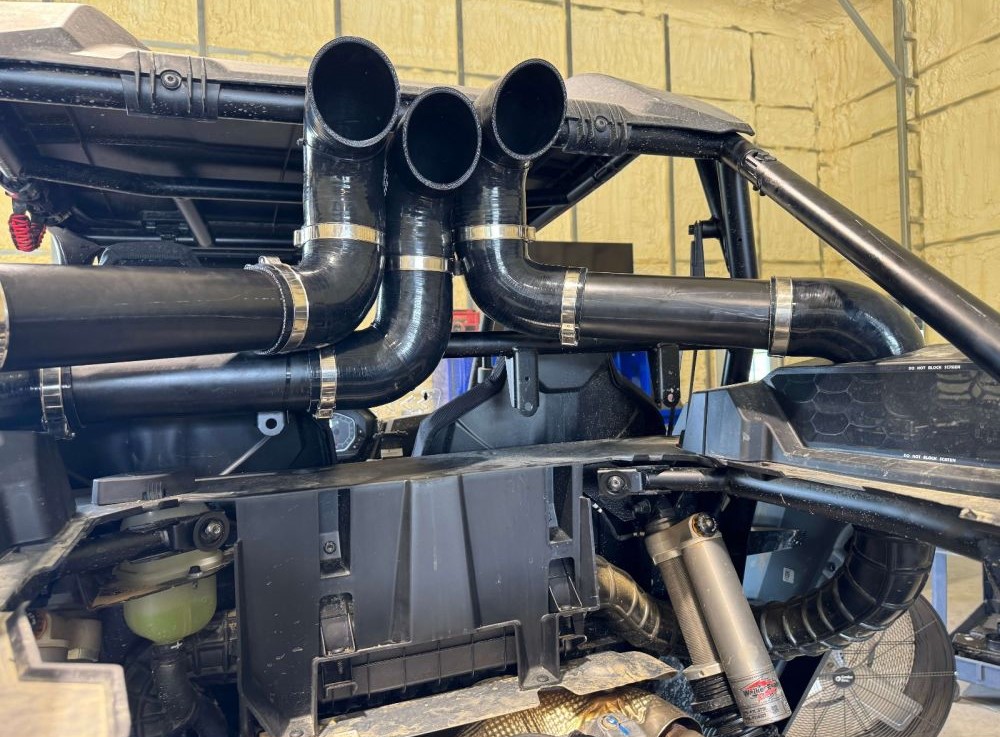
Can-Am CVT and Snorkel Maintenance Guide
 December 22, 2025
 -
Can-Am Defender Subwoofer Box Guide: Waterproofing, Fitment & Vibration Solutions
 December 16, 2025
 -
Honda CR-V Alternator
 December 15, 2025
 -
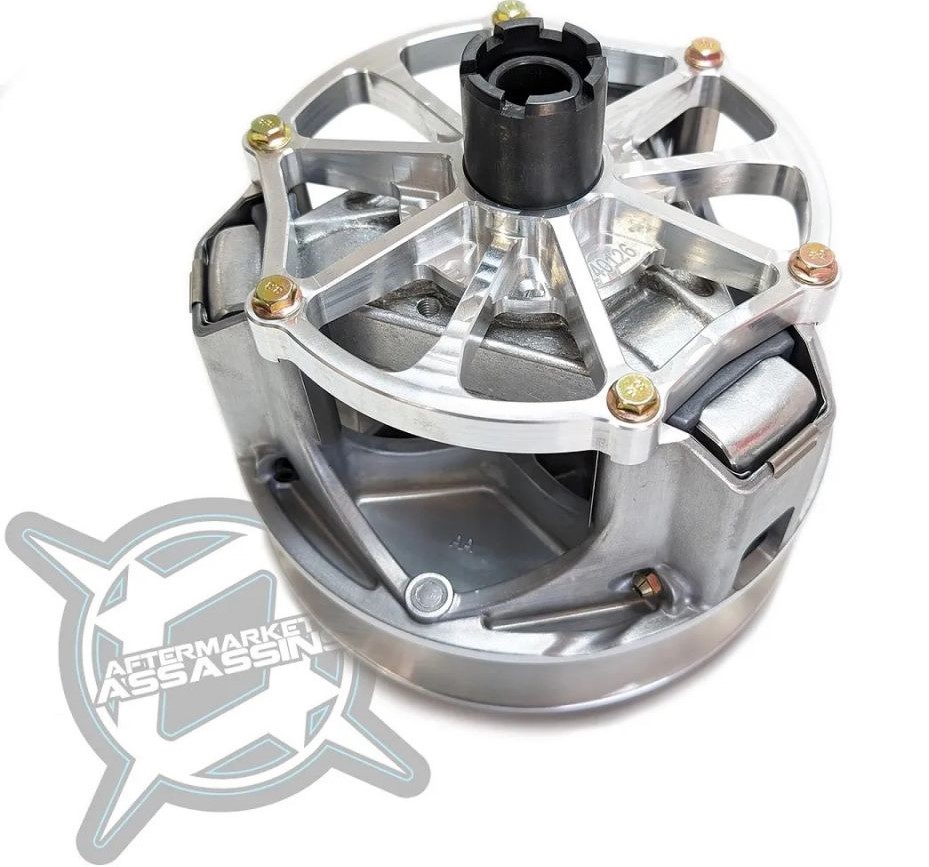
Aftermarket Assassins Primary Clutch Review: Billet vs Weight Kits Performance Analysis
 December 8, 2025
 -
How to Diagnose Electrical and ECU Problems in Your Can-Am
 December 3, 2025