Can-Am Defender Trailing Arm Conversion: How a Long-Travel Setup Transforms Your Ride
Can-Am Defender Trailing Arm Conversion Guide
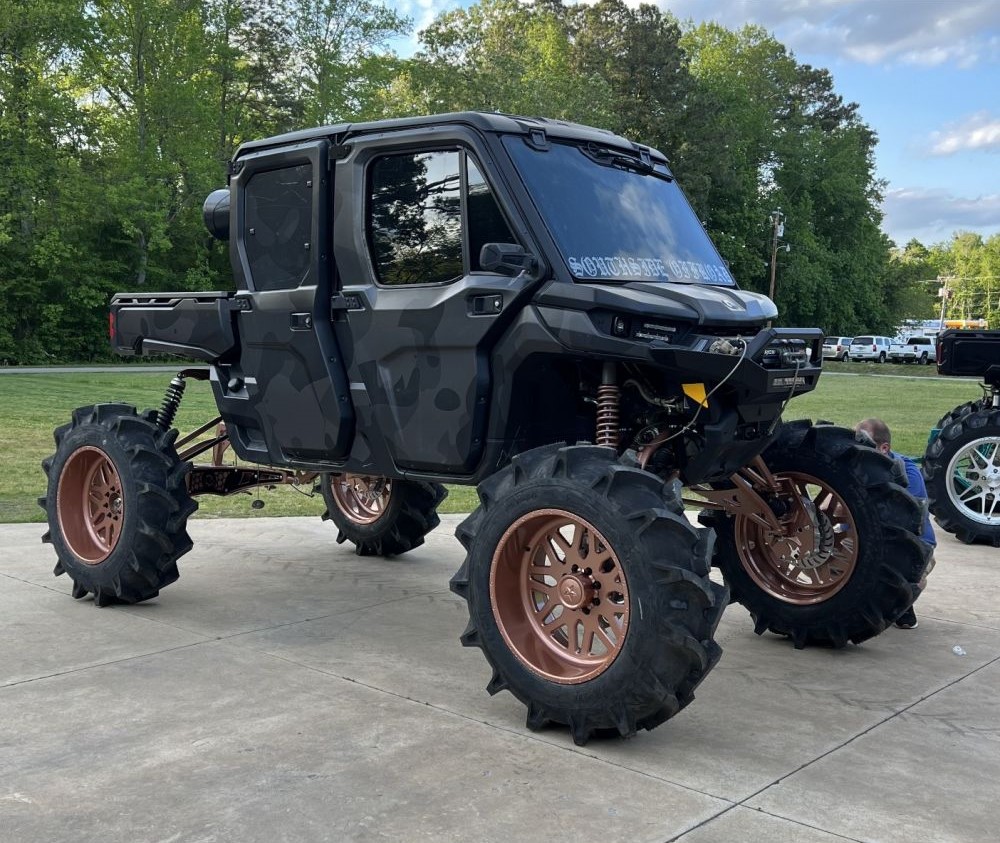
If you’ve been pushing your Can-Am Defender to its limits—hauling gear, navigating trails, or just plain having fun—there’s a good chance you've felt the limitations of the stock suspension. This upgrade transforms your ride into a long-travel beast, soaking up bumps like never before. Whether you’re eyeing more articulation, better ground clearance, or just a smoother ride, a trailing-arm setup paired with a Defender 6-inch lift with trailing arms changes everything. Let’s break down why it works, what it includes, and how you can get started with your build.
Why Convert to Trailing Arms?
Performance Benefits
- Increased suspension travel for better articulation
- Improved axle geometry, especially when lifting
- Less camber change through the travel arc
- Room for larger tires and more aggressive off-road setups
The original A-arm rear setup is decent for light trail use, but it’s no match for what a Can-Am Defender long-travel kit can do. With a trailing arm conversion, you get the benefits listed above that combine to give you more control, especially on uneven terrain or when running at higher speeds.
Ride Quality Improvement
Nobody wants a bumpy, back-breaking ride. This upgrade drastically improves ride comfort thanks to the longer arm design and optimized shock placement. With a defender 6-inch lift with trailing arms, the suspension becomes more progressive, meaning it absorbs small hits better and doesn’t bottom out as easily on the big stuff.
Compatibility & Kit Overview
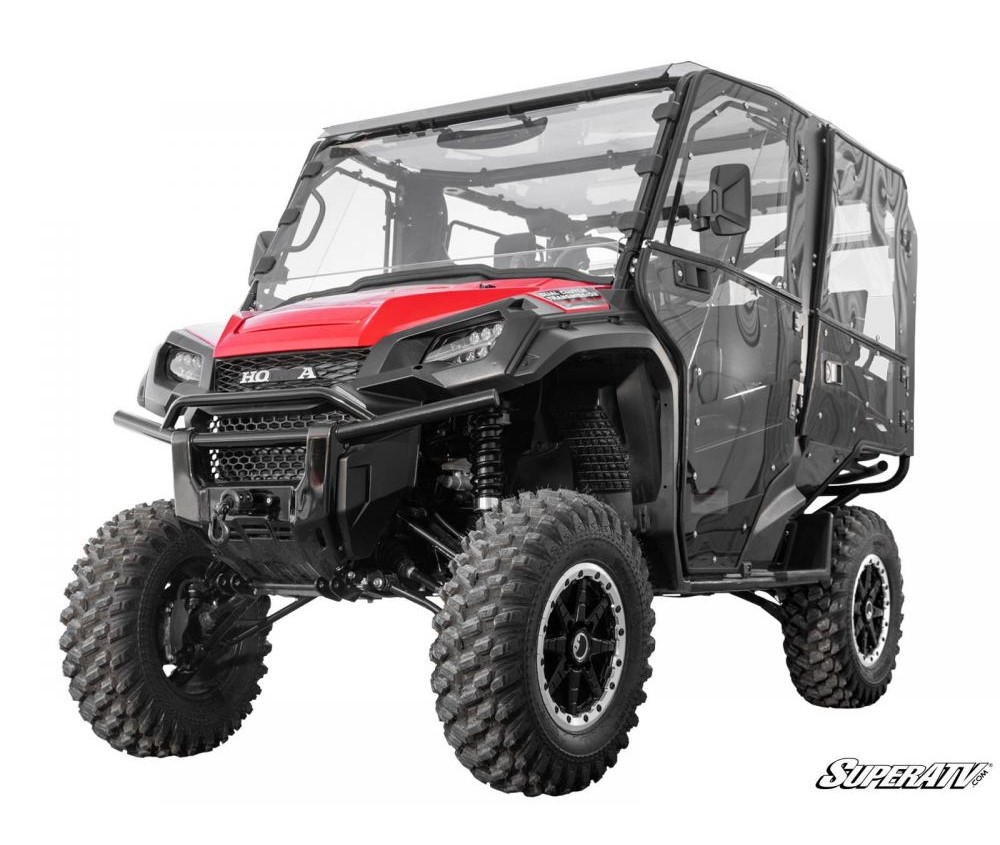
Compatible Can-Am Defender Models
- Defender HD10 (2020–2025)
- Defender MAX models
- Limited and Lone Star editions
Always double-check frame and suspension geometry before ordering your kit—lift compatibility matters.
Kit Components
- Trailing arms (beefed up and boxed)
- Long-travel axles
- Extended brake lines
- High-clearance radius rods
- Rear shock relocation brackets
- Optional: Portals for gear reduction and added clearance
Some kits also come pre-powder-coated and include all necessary hardware for a full install.
Installation Process
Tools Required
- Socket set (including torque wrench)
- Floor jack and stands
- Impact gun (recommended)
- Spring compressor (if reusing factory shocks)
- Grease and thread locker
Step-by-Step Overview: Installing a Can-Am Defender Trailing Arm Conversion
A Can-Am Defender trailing arm conversion is one of the most rewarding upgrades you can tackle. While it takes time, most experienced DIYers can complete the job over a weekend. Here’s a breakdown of what the process involves:
- Lift and secure the vehicle on stands. Start by lifting the rear of your Can-Am Defender and securing it with heavy-duty jack stands or a lift. Make sure the machine is stable and positioned on a flat surface before you begin any disassembly.
- Remove factory suspension components. Take off the stock rear suspension setup—this includes the A-arms, shocks, axles, and radius rods. Keep your bolts and spacers organized. Some hardware may be reused depending on your Can-Am Defender long-travel kit.
- Install new trailing arms and axles. Mount the trailing arms included in your Defender 6-inch lift with trailing arms. These allow for longer suspension travel and are typically much stronger than OEM parts. Swap in the extended axles as well, which are designed to match the new geometry.
- Relocate shocks. Using the included brackets, reposition the shocks to fit with the new trailing arm layout. Proper alignment is critical for performance and ride quality.
- Check clearance and torque everything. Before wrapping up, inspect the rear suspension for any clearance issues. Torque all fasteners to the specified values in your kit instructions.
- Bleed brake lines. If your kit includes extended brake lines, make sure to bleed the system properly. You don’t want to risk soft brakes after the install.
- Test ride and re-torque. Take your Defender out for a short trail run. After the ride, recheck all bolts and retorque them as needed. It’s a good idea to do this again after the next few rides to ensure nothing shifts as the suspension settles.
With patience and the right tools, installing a Can-Am Defender trailing arm conversion can be both satisfying and game-changing for your off-road experience.
Frequently Asked Questions
Q: Will a Can-Am Defender trailing arm conversion void my warranty?
A: This depends on your dealership and the terms of your warranty. Some dealers are modification-friendly, especially if the upgrade is professionally installed and uses high-quality components. Others may void coverage on related parts, like suspension or driveline components. It’s best to check with your dealer beforehand and get their policy in writing.
Q: Do I need portals when installing a trailing arm setup?
A: Portals aren’t required, but they pair beautifully with a Can-Am Defender trailing arm conversion They provide gear reduction, extra ground clearance, and help reduce strain on your drivetrain. If you ride in deep mud or rocky terrain, portals are a solid performance upgrade to consider.
Q: Can I still tow with a trailing arm conversion?
A: Absolutely—but proceed with care. A defender 6-inch lift with trailing arms changes your suspension height and geometry, which affects the angle of your hitch. You may need a drop hitch or extension to maintain a safe towing angle. Always double-check your trailer tongue weight and balance after lifting.
Q: Do I need longer axles?
A: Yes. A Can-Am Defender long-travel kit extends the suspension, which means your factory axles won’t reach. Most kits include extended axles to fit perfectly with the new geometry.
Q: How hard is the install?
A: Intermediate to advanced. It’s a solid weekend project if you’ve got the tools, time, and mechanical know-how.
Shop Trailing Arm Kits for Can-Am Defender
Explore full Can-Am Defender long-travel kits at Dig Rig Powersports. Pair them with portals or shock upgrades to take your build even further.
Contact us today and we’ll help match you with the best Can-Am Defender trailing arm conversion kit for your ride.
-
Can-Am CVT and Snorkel Maintenance Guide
 December 22, 2025
 -
Can-Am Defender Subwoofer Box Guide: Waterproofing, Fitment & Vibration Solutions
 December 16, 2025
 -
Honda CR-V Alternator
 December 15, 2025
 -
Aftermarket Assassins Primary Clutch Review: Billet vs Weight Kits Performance Analysis
 December 8, 2025
 -
How to Diagnose Electrical and ECU Problems in Your Can-Am
 December 3, 2025