ATV and UTV
-
December 22, 2025
If you ride a Can-Am long enough, you learn one thing fast: mud and water love sneaking into places they don’t belong. That’s why Can-Am CVT maintenance is something every rider should take seriously, especially if you spend weekends splashing through creeks, cutting through swamp trails, or chasing mud holes that swallow half the machine. When the CVT gets wet, belts slip, clutches glaze, and your ride day turns into a long push home.
With the right habits, the right checks, and the right sealing tricks, Can-Am CVT maintenance becomes simple, reliable, and something you’ll thank yourself for every time you hit deep water.Why Water Gets into the CVT
Before diving into steps, it helps to understand where the trouble starts. Most “water in CVT” issues come from missed seals, old parts, or pressure changes during deep water crossings.
Common Ways Water Creeps In
A worn CVT seal that no longer seats tightly
A pinched or damaged belt box gasket
Poor vent routing that sits too low
Improper sealing where riders forgot RTV silicone
A cracked or loose clutch housing
Overwhelming the system with high-speed splashes
The more you ride water and mud, the more these weak points start to show. That’s why Can-Am CVT maintenance is all about staying ahead of these failure zones. -
December 15, 2025
Your Honda CR-V alternator does more than just charge your battery; it powers your entire driving experience. From keeping your headlights bright to ensuring your infotainment system never fades, your alternator is the heart of your Honda CR-V charging system When this crucial part starts to weaken, you’ll feel it: dim lights, low power, and warning lights on your dashboard. Whether you’re hunting for a Honda CR-V alternator replacement or planning a Honda CR-V alternator upgrade for extra juice, PowerBastards has you covered. Designed for both daily drivers and performance enthusiasts, our high-output alternator Honda models deliver reliable energy under any load. If you’re ready to say goodbye to battery drain and CR-V electrical issues, this guide is for you.
Common Signs of Alternator Failure
When your Honda CR-V alternator begins to fail, it won’t stay silent for long. Here’s what to watch for:
- Dim or flickering headlights: A drop in alternator voltage output causes uneven light intensity.
- Battery warning light on your dash: Often the first clue of Honda alternator problems.
- Unusual noises: A grinding or whining sound could mean
-
December 03, 2025
If you ride long enough, you’re guaranteed to run into electrical headaches, from random dash warnings to a machine that refuses to start. Understanding common Can-Am electrical problems can save your weekend rides more than almost anything else. When your ATV suddenly drops into limp mode, throws a DPS error, or suffers from a fast battery drain, it can feel frustrating and confusing. But in most cases, the cause is surprisingly simple, often involving loose grounds, weak relays, or moisture in a fuse box.
This guide breaks down the most common Can-Am electrical problems, explains how to troubleshoot them quickly, and gives you practical steps you can use on your next ride.
Common Electrical Failures in Outlander and Renegade Models
Electrical issues in Can-Am machines typically start small but quickly demand your attention. Before diving into the fixes, it helps to know the most common trouble areas responsible for Can-Am electrical problems.
Battery Drain and Charging Problems
Many riders notice slow cranking, flickering lights, or complete battery drain after riding through mud or water. Common causes include:
- A weak voltage regulator
- Loose or dirty ground connections
- A failing starter
-
October 14, 2025
If you’ve spent any real time behind the wheel of a Can-Am Maverick X3, you know that these machines are absolute beasts, until a clutch issue cuts the fun short. Whether you’re bombing across the dunes, crawling over rocks, or powering through muddy trails, your Can-Am X3 clutch kit is the heart of your UTV’s performance. But here’s the truth, clutch kits aren’t “install it and forget it” parts. Belt slip, heat build-up, poor backshift, and incorrect helix or spring choices can all tank your ride’s power and reliability.
This guide breaks down the most common Can-Am X3 clutch kit problems, explains how to fix them, and shares pro-level tuning tips so you can ride harder, longer, and with fewer breakdowns.
Understanding Can-Am X3 Clutch Kit Fundamentals
Before you can fix problems, you need to understand what’s going on under the hood, or in this case, under the clutch cover.
How X3 Clutch Systems Work
The Can-Am X3 uses a CVT (Continuously Variable Transmission) with a primary and secondary clutch. The Can-Am X3 clutch kit modifies how these clutches engage, shift, and backshift based on your RPMs and load. The primary clutch controls belt grip and engagement, while the secondary clutch manages belt tension and backshifting. Together, they keep your engine in its powerband whether you’re blasting at high speed or crawling over obstacles.
Common
-
October 14, 2025
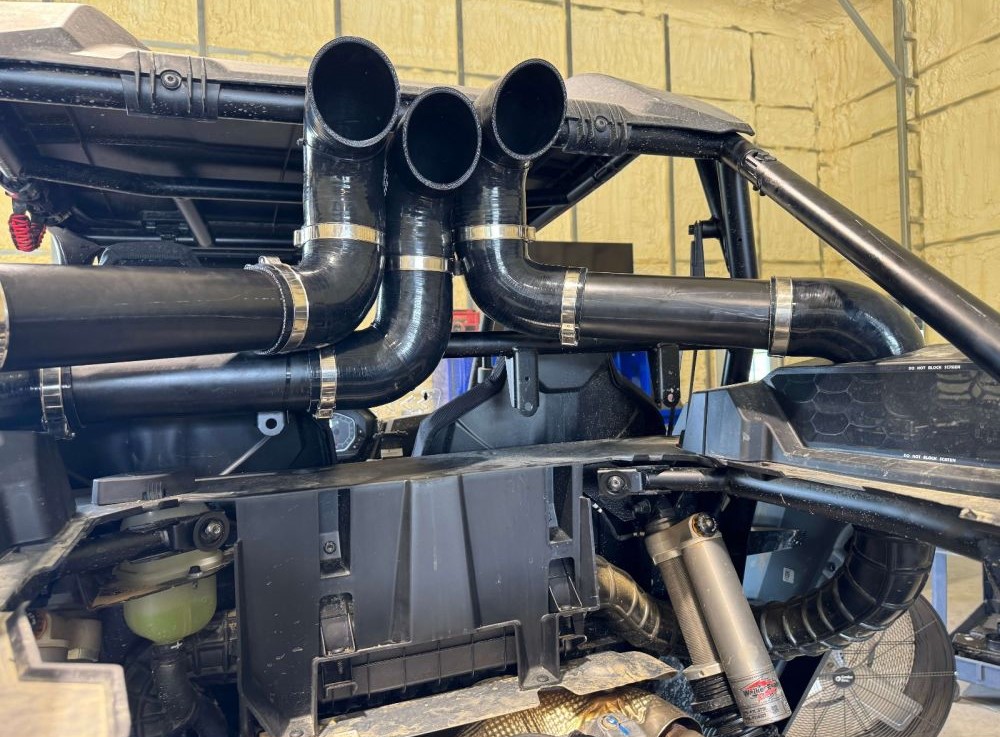
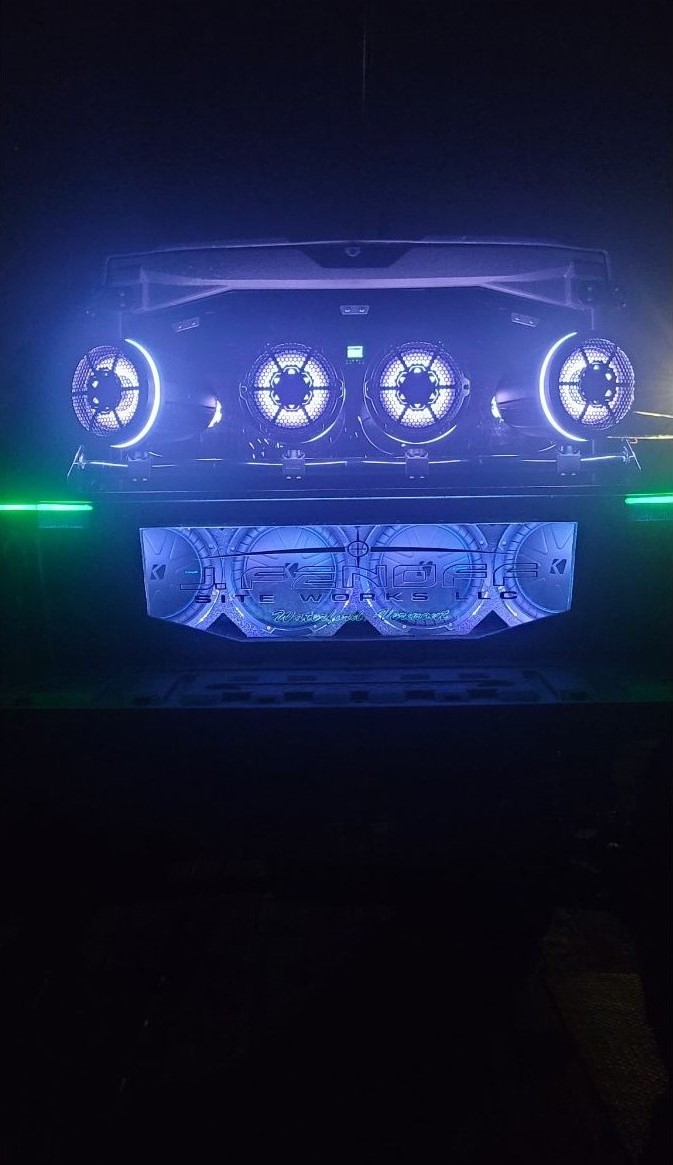
When you’re tearing across open dunes or picking your way through muddy trails, the right soundtrack can make the adventure unforgettable. For Can-Am X3 owners, that often means upgrading to a Can-Am X3 subwoofer box for deep, powerful bass that cuts through engine noise and wind.
However, adding a subwoofer to your X3 isn’t as simple as bolting it in place. The process comes with unique challenges that require careful planning. You’ll need to consider X3 sub box under-seat fitment, which varies between 2-seat and 4-seat models, making measurements and clearance checks essential.
Then there’s the matter of protection. Riding in wet or muddy conditions increases the risk of water intrusion, so proper sealing and X3 subwoofer water protection become crucial for longevity and performance. Finally, hot summer rides can push your amplifier to the limit, making amp placement and cooling strategies essential to prevent thermal shutdowns.
This guide covers it all, fitment, waterproofing, amp cooling, and expert tips, so you can enjoy thundering bass without compromising reliability on any terrain.
Understanding Can-Am X3 Subwoofer Box Options
Before you break out the tools, it’s worth understanding why not all Can-Am X3 subwoofer box options are created equal. Factory audio leaves a lot to be desired, especially for riders who crave deep, clean bass at higher volumes.
-
October 13, 2025
When Polaris owners start looking for ways to toughen up their rides for serious trail abuse, one upgrade comes up in almost every garage conversation—the RS1 front diff conversion kit. This isn’t some flashy add-on you buy just for looks. It’s the fix for broken XP differentials, the upgrade that puts durability back on your side, and the smart move if you want Turbo-S level confidence in your RZR. Think of it as a game-changer for riders who keep blowing stock parts and are tired of spending more time wrenching than riding.
But here’s the real question: is it worth it? Riders want to know if the RS1 can truly outlast built XP diffs, how gnarly the installation really gets, and whether the final price tag delivers long-term value. That’s where this guide comes in. From RS1 differential skid plate trimming and tricky bracket alignment to wiring tweaks and cost breakdowns, we’re unpacking the RS1 front diff conversion kit in a way every rider can relate to, straight talk, no fluff.
Understanding RS1 Front Differential Conversion Benefits
Upgrading to an RS1 front diff conversion kit gives you a stronger, smarter drivetrain built to handle serious abuse. The RS1 differential was designed for a single-seat RZR that demanded instant throttle response, heavy loads, and more reliable engagement. Swapping it into an XP chassis is one of the smartest RS1 diff conversion benefits riders can grab.
RS1/Turbo-S Diff vs Built XP Diff Durability Comparison
-
October 13, 2025
If you’re serious about pushing your UTV to new heights, literally, the Dirty T Fab UTV lift is a game-changer. Whether you’re cruising desert flats, conquering rocky climbs, or floating over deep mud, this lift system delivers the clearance, suspension travel, and off-road geometry you need. But it’s more than just bolting on bigger parts. With a Dirty T Offroad lift kit, you’re working with advanced engineering designed for extreme use, which means installation, setup, and maintenance all require attention to detail.
This guide breaks down everything, UTV trailing arm conversion options, the realities of a Dirty T Fab 6-inch lift, managing UTV lift CV angles, keeping your Dirty T bed dump function smooth, ball-joint-delete compatibility, ride quality tweaks, and long-term upkeep, so you get maximum performance without sacrificing reliability.
Understanding Dirty T Fab UTV Lift Systems
Before diving into install tips and geometry changes, it’s important to understand what sets Dirty T apart from generic kits.
What Makes Dirty T Fab Different
- Precision Engineering: Every Dirty T Fab UTV lift is designed with off-road abuse in mind, reducing premature wear.
- Full Suspension Integration: Works seamlessly
-
October 13, 2025
For Can-Am riders chasing more power, smoother engagement, and real control over how their UTV handles big tires and tunes, the STM clutch Can-Am system is a serious game-changer. Unlike stock setups, STM clutches allow riders to fine-tune weights, springs, and helix combinations to match their build perfectly. But along with performance comes a reputation for STM clutch tuning complexity, extra maintenance, and higher ownership costs. That leaves many riders wondering, are the gains worth it?
This guide breaks down the differences between STM and OEM systems, explains tuning and maintenance, highlights STM clutch real-world gains, and even covers common problems. Whether you’re considering oversized tires, running a big tune, or simply want better durability, the STM clutch Can-Am upgrade deserves a closer look.
Understanding STM Clutch Technology for Can-Am UTVs
When riders start looking for more control, smoother engagement, and the ability to push their machines harder, the STM clutch Can-Am system comes into play. These clutches aren’t just stronger, they’re engineered with adjustability in mind. That adjustability lets riders fine-tune how power is delivered depending on terrain, tire size, load, and horsepower. Whether you’re crawling rocky trails, running oversized mud tires, or blasting dunes with a tuned engine, an STM setup gives you the flexibility to make your machine respond the way you want.
-
October 10, 2025
If you own a 2013–2015 Can-Am Maverick 1000, you already know it’s a powerhouse. But even this beast can be a little temperamental when it comes to clutch performance. Over time, many riders notice issues like surging RPMs at mid-throttle, jerky take-offs, or uneven power delivery. These aren’t just small quirks; they’re common signs of Can-Am Maverick 1000 clutch kit problems. Two of the biggest complaints are RPM hunting and harsh engagement, both of which can make your ride less enjoyable and even cause extra wear on your machine. The good news? These problems can be fixed with the right setup and maintenance.
In this guide, we’ll explain what causes these issues, how to solve them, and how to choose the perfect clutch kit for your riding style: whether you stick to trails, tackle deep mud, or ride in a mix of conditions.
Understanding Can-Am Maverick 1000 Clutch Issues
The original Mavericks are known for raw power, but their clutch systems need the right setup to transfer that power smoothly. Without proper tuning, you can end up with erratic engagement, belt wear, or performance loss.
Common Problems in 2013–2015 Models
Early models often suffer from:
-
September 09, 2025
If you're the kind of UTV rider who believes “stock is just a starting point,” then chances are you've come across the ball joint delete Can-Am Defender buzz. Whether you’re crawling through the mud, hauling gear, or bombing through rugged backwoods trails, your front-end setup takes a serious beating. And those factory ball joints? They’re often the first to throw in the towel. That’s where the ball joint delete Can-Am Defender upgrade steps in. This mod swaps out your vulnerable OEM joints for a beefier, more robust alternative, and riders everywhere are talking about it. But is it all good news? Let’s break it down, so you know what you’re getting into before wrenching.
What Is a Ball Joint Delete?
A ball joint delete Can-Am Defender is exactly what it sounds like, removing the factory-installed ball joints and replacing them with a Defender uniball conversion or similar heavy-duty component. Traditional ball joints are flexible connectors that allow for smooth articulation between the A-arms and knuckle. The trouble is, they’re also a high-failure point on most UTVs.
The ball joint delete replaces that weak link with a uniball or heim-style joint, usually supported by a reinforced A-arm and knuckle system. This style of upgrade is built for UTV front suspension mods that prioritize durability, simplicity, and raw toughness over the comfort of factory suspension geometry.
Why Consider One for Your Defender?
-
Can-Am CVT and Snorkel Maintenance Guide
 December 22, 2025
 -
Can-Am Defender Subwoofer Box Guide: Waterproofing, Fitment & Vibration Solutions
 December 16, 2025
 -
Honda CR-V Alternator
 December 15, 2025
 -
Aftermarket Assassins Primary Clutch Review: Billet vs Weight Kits Performance Analysis
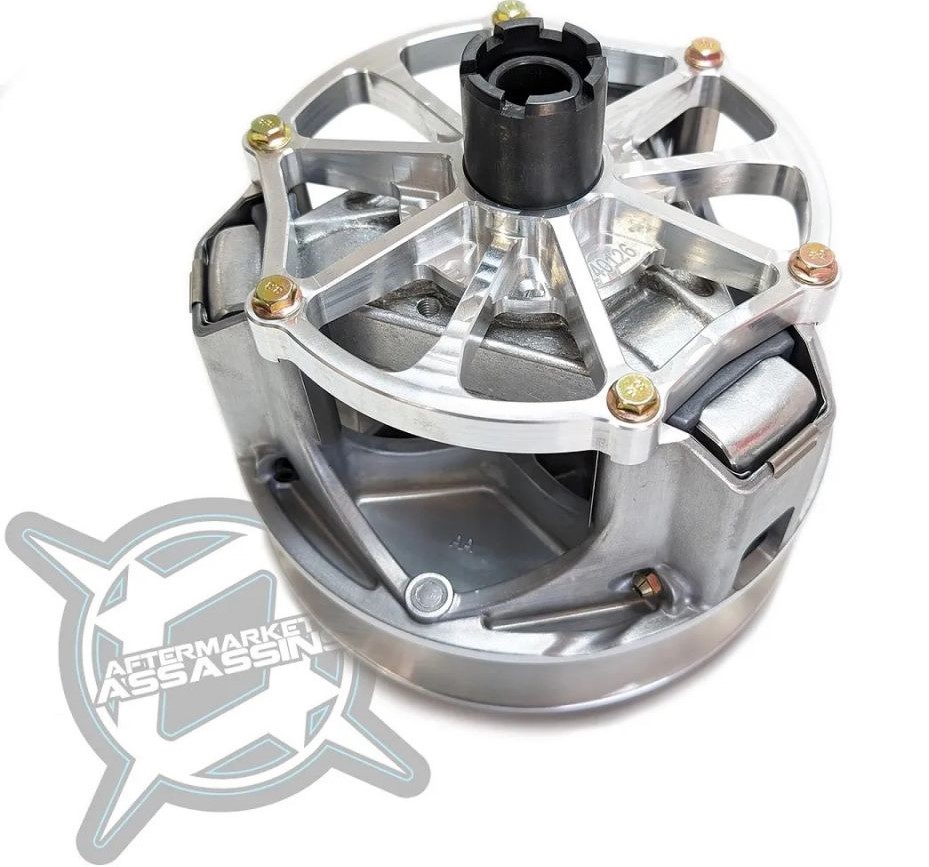 December 8, 2025
 -
How to Diagnose Electrical and ECU Problems in Your Can-Am
 December 3, 2025